Photeeq Lens Flare: Enhancing Photography with Stunning Light Effects
Photography is a creative blend of light, composition, and storytelling. One of the most intriguing visual effects that can elevate an image is lens flare. When used effectively, lens flare adds warmth, depth, and an artistic touch to photos. Among the various tools available, Photeeq Lens Flare has gained popularity for its ability to create stunning flare effects that replicate natural light behavior.
This blog post will cover everything you need to know about Photeeq Lens Flare, including its significance, methods for incorporating it into your images, common mistakes to avoid, and technical aspects that make it a valuable tool for photographers.
What is Lens Flare?
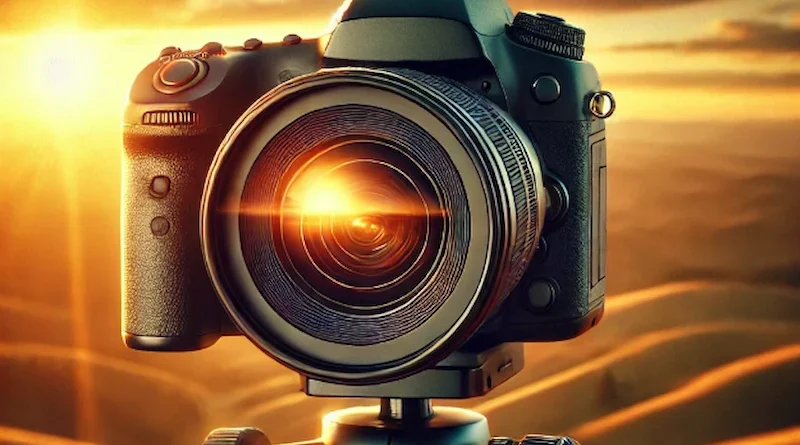
Lens flare occurs when bright light, such as sunlight or artificial lights, enters the camera lens and scatters due to reflections within the lens elements. This can result in streaks, rings, or a soft glow across the image. While some photographers consider lens flare an imperfection, others use it deliberately to add emotion and depth to their compositions.
Photeeq Lens Flare is a tool that allows photographers to digitally create and enhance lens flare effects. Whether you’re working with natural light or editing an image in post-processing, this tool enables precise control over the intensity, position, and color of lens flares to achieve the desired impact.
Benefits of Using Photeeq Lens Flare
1. Enhancing the Mood and Atmosphere
Lens flare can create a dreamy, cinematic effect. A well-placed flare can evoke emotions, making an image feel nostalgic, warm, or dramatic.
2. Directing the Viewer’s Attention
Flare effects can be strategically placed to guide the viewer’s eye toward the subject, ensuring that key elements of the composition stand out.
3. Adding Depth and Dimension
Incorporating lens flare into an image adds layers of light and shadow, making the photograph appear more three-dimensional.
4. Creating a Natural Light Source
For images that lack dynamic lighting, adding Photeeq Lens Flare can introduce a natural glow, making the photograph more visually appealing.
5. Professional and Artistic Appeal
Using lens flare correctly can give images a polished, high-end look, often seen in professional photography and cinematography.
How to Use Photeeq Lens Flare Effectively
1. Choosing the Right Conditions
- Lens flare looks most natural when there is an existing light source, such as the sun or streetlights.
- Shooting during golden hour (shortly after sunrise or before sunset) enhances the warm glow of flare effects.
2. Adjusting the Angle of Light
- Changing the camera angle relative to the light source alters the intensity and pattern of the lens flare.
- Experiment with positioning the light partially outside the frame for a subtle effect.
3. Controlling Intensity and Brightness
- Overpowering flare can reduce image clarity and detail.
- Adjusting opacity, brightness, and contrast ensures the effect remains realistic and enhances rather than distracts.
4. Using Post-Processing for Precision
- Photeeq Lens Flare provides editing tools that let you fine-tune flare size, shape, and color.
- Software like Adobe Lightroom and Photoshop allows additional modifications for a seamless blend.
5. Maintaining a Balanced Composition
- Lens flare should complement the subject, not overpower it.
- Consider the rule of thirds and leading lines to integrate flare naturally into the image.
Common Mistakes to Avoid
1. Overusing Lens Flare
Adding too much lens flare can distract from the main subject and make the image look artificial. Use it sparingly to enhance rather than dominate the scene.
2. Placing Flare in Unnatural Locations
Flare should be positioned where a natural light source exists. Random placement can make the image look digitally altered and unconvincing.
3. Ignoring Image Composition
Lens flare should complement the overall composition. If the flare disrupts balance, the image may feel unstructured.
4. Mismatching Color Temperature
The color of the flare should match the ambient light in the image. For instance, using a cool-toned flare in a warm sunset scene can make the effect look unnatural.
The Science Behind Photeeq Lens Flare
1. Light Reflection and Refraction
Lens flare is a result of light bouncing between elements inside a lens before reaching the camera sensor. This tool replicates that effect digitally by simulating light physics.
2. Optical Aberrations and Bokeh
By introducing controlled aberrations, Photeeq Lens Flare mimics real-life camera imperfections, creating realistic light streaks and halos.
3. Adjustable Intensity and Shape
Photographers can manipulate the flare’s shape, brightness, and spread to achieve a natural or dramatic look.
Tips for Achieving the Best Lens Flare Effects
1. Use Prime Lenses
Lenses with fewer elements (like prime lenses) often create more defined flare patterns compared to zoom lenses.
2. Experiment with Aperture Settings
A wider aperture (low f-stop) produces softer, more diffused flares, while a narrow aperture (high f-stop) creates starburst-like effects.
3. Combine Natural and Digital Effects
If your photo already has some natural flare, enhancing it with Photeeq Lens Flare can make it look even more dramatic and controlled.
4. Use Lens Hoods for Control
If you want to minimize unwanted flare, use a lens hood to block excessive light from entering the lens.
Conclusion
Photeeq Lens Flare is a powerful tool that allows photographers and designers to enhance their images with realistic light effects. When used correctly, it adds warmth, dimension, and visual interest to photographs, making them more engaging and professional.
By understanding how lens flare works, where to place it, and how to avoid common mistakes, you can elevate your photography to the next level. Whether you’re shooting with natural light or adding effects in post-processing, lens flare is an artistic element that can bring a unique and captivating touch to your images.
FAQs
What is Photeeq Lens Flare used for?
Photeeq Lens Flare is used to add cinematic and artistic light effects to photos, enhancing their overall appeal.
Can I use Photeeq Lens Flare for video editing?
Yes! Many videographers use Photeeq Lens Flare to create stunning light effects in their footage.
How do I make lens flare look natural?
Place it near an actual light source in the image, adjust brightness, and ensure it matches the scene’s lighting conditions.
Is Photeeq Lens Flare beginner-friendly?
Yes, it’s designed for both beginners and professionals, offering easy-to-use controls for achieving realistic flare effects.
Can too much lens flare ruin an image?
Yes. Excessive use of lens flare can overpower the subject and reduce image clarity. Use it thoughtfully for the best results.
Visit the rest of the site for more interesting and useful articles.